Powerful Unraid NAS PC Upgrades & Server Chassis Swap: The Next Generation of My HomeLab
Introduction:
If you guys read my last post on this ongoing project you’ll know I have a home NAS (Network Attached Storage) running Unraid, and a slew of dockers for my personal media collection, Youtube footage, and Dedicated Game Servers. I’f you havent yet read that post and are interested, please go take a look as some of this post will be easier to follow with the extra context, not required, just recommended.
If you want to know the whole story, just watch the video below for a recap:
But First, Why?
So my current system is setup within a Node 804 chassis by Fractal Design. On of my favorite case manufacturer’s. Let me tell you it has been a wonderful enclosure for my system, every bit as comfortable to work in and easy on the eyes as my main rig built in the classic Define R6 by the same great guys down at Fractal. The downside is that that system is limited to 8 3.5 inch drives and 2 2.5 in drives total. Which I have already maxed out.
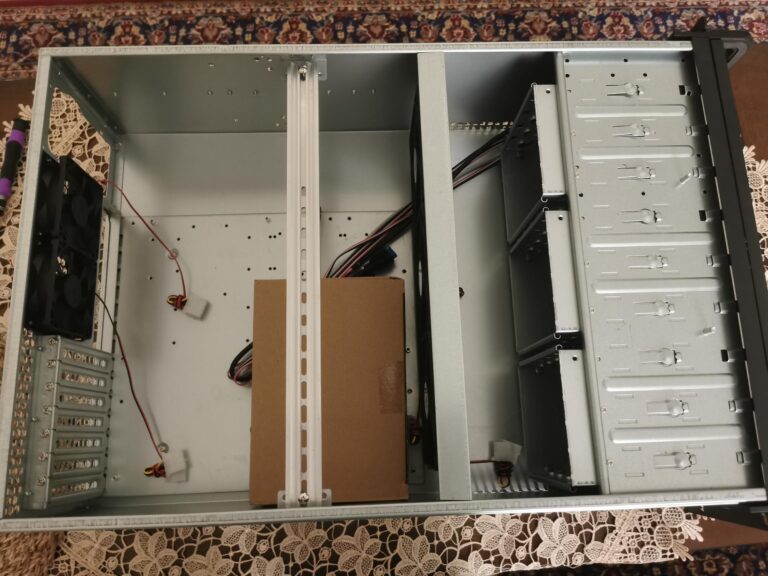
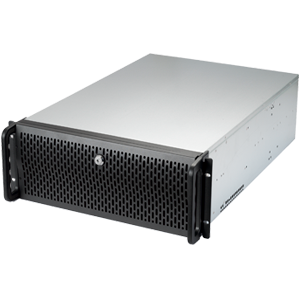
Now I still have space for Data on those drives, and could always swap a drive for one of a larger size… Buuuut, I also have a nice pretty server rack currently holding my HP Proliant DL380 webserver that’s just begging for a friend. So with consolidation in mind and my wife wanting to take over the Node 804 case for her own, I went ahead and picked up a Rosewill RS-L4500U as the HomeLab’s next home.
Rosewill RS-L4500U & Extra's
The first step in building any NAS is selecting the right hardware components. A simple network attached storage array does not require much CPU horsepower, however utilizing your NAS as a Plex Media Server, dedicated game server, and so on, may require more then the average Celeron. Considering this is my main rig, and handles not only dedicated game servers, a plex instance, and several other dockers I plan on doing write-ups on, I want this to be as capable a system as I can make it.
The CPU in my current system is an Intel Xeon E-3 1245 v2, a 4 core/8 thread chunk of xeony goodness, and has been up to the task for everything except for Tdarr Nodes (more on this to come). This replaced the previous iteration, an i5-3000 series I had used previously, but will now be re-purposed to an unraid test bench and monitoring server for my other machines. To be honest I have been extremly please with this chip, the only reason I am swapping to something else is to better utilize the additional space in the L4500U. The Node 804 is limited to Micro-ATX mobo’s, but the Rosewill has a little more room for activities, up to and including E-ATX motherboards. Which means I can now make the leap to a dual xeon platform.
I was able to pick up a SuperMicro X8DTH-6F with 2 Xeon E5545’s and 24GB’s of ECC DDR3 for a cool $99.00 USD in a combo deal.
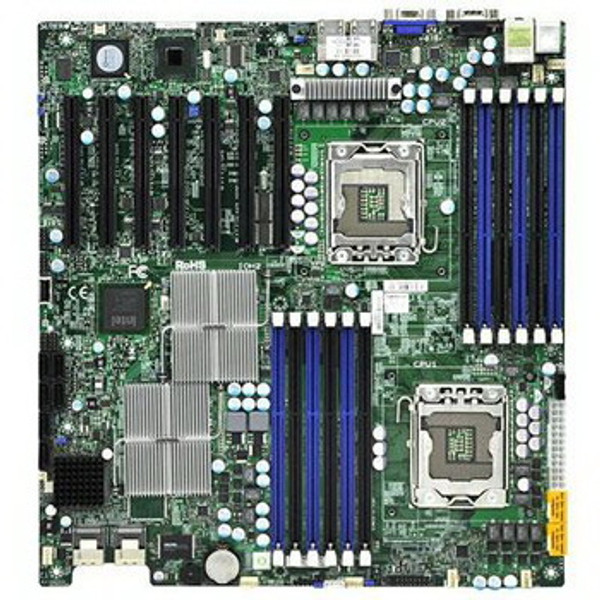
One of the nice upgrades from my current setup to the X8DTH-6F is obviously the inclusion of dual xeon processors, but also this board has an onboard 8i HBA, meaning two internal sas connectors can feed up to 8 internal SATA drives, 4 each.
Now I bought mine from the Fleabay, so YMMV but for my needs this was a perfect solution. If your looking for a similar board take a look at the included Ebay link to a search for this board. And keep your eye out for a combo deal, just cant beat it.
Building the System
For the purpose of this guide I am going to assume you are familiar with the foundations of PC building, but feel free to read my last Unraid post for initial setup if your unfamiliar by clicking HERE.
Beyond basic assembly one niche aspect of this system is the addition of an HP H220 HBA, or SATA/SAS controller. Most modern motherboards only provide 4-10 SATA connectors, including my new X8DTH-6F motherboard boasting a solid 6 SATA connectors as well as an onboard HBA for extra SAS/SATA connections. The HP H220 grants me another 8, and can be acquired for roughly $40.00-$80.00 USD through Amazon or Ebay. I am using mine since I have it, but depending on the number of drives your planning to use and the connections you have available this may not be necessary.
Once everything is in the case its as simple as plugging in the same USB Uraid OS as was used in the last server and we are ready to go. Thankfully Unraid lives on your USB key, and is not tied to the mother board or other hardware in any way other than the ID’s of the Drives its looking for. Otherwise the build is fairly straightforward.
The main thing to remember and be aware of when doing a platform swap on Unraid is to make sure the UIDs of your drives go back in the exact same slots in the webGUI. This does mean that improperly assigned drives will mean wiped data, so caution is the name of the game.
Before swapping the drives to the new case I went into my current setup and took screenshots of the drive layout, made sure all my plugins and dockers were updated as well as the base OS, and took a screenshot of the “Devices” tab under tools to make sure if something was assigned a new UID I would be able to find the right info.
Finishing Up
Now that the Server is back up and running, we have a dedicated game server running and a platform to install more in a handful of button clicks. We also have a much more robust platform for our Plex Media Server or similar media streaming service, home assistant, the list goes on and the possibilities are endless.
If you want to see more setup guides on Unraid Dockers, take a look at my other write ups for more.
If the information in this guide was helpful to you, consider signing up for the SentiMentelTech Newsletter and leave me a comment.
Supscribers and Followers to my up and coming Youtube Channel and Social Media is also greatly appreciated, if you want to help me keep making content like this please consider clicking the Social Icon’s below!