Building a Powerful Unraid NAS PC and Initial Setup: A Comprehensive Guide
Introduction:
Building your own Network Attached Storage (NAS) can be a rewarding DIY project that allows you to create a centralized storage solution for your home or office. In this post, we’ll walk you through the process of building a powerful Unraid NAS using a Xeon E3 1245v2 processor, 32 GB of RAM, and a Fractal Design Node 804 case. We’ll cover everything from selecting the right hardware components to the initial setup to get your Unraid NAS up and running smoothly.

But First, Why?
Network attached storage solutions are now becoming common knowledge, and can be found in many households. Be it a family photo repository or a place for you to house your vast electronic media collection, network attached storage systems can be an efficient and cost effective way to manage your data. In my home I have used a FreeNAS (or TrueNAS) system housing my raw video footage, backing up my content uploads, as well as running a Plex Home Media Server, for the past 5 years or so. I am extremely happy with the stability of FreeNAS and I’m a strong advocate for ZFS. Some of the Pro’s of that system are the transfer speed as well as its long term stability without much upkeep. However after some recent testing on Unraid, I’ve decided to fully transition my storage solution to Unraid in light of their ease of use and Docker integration for several applications.
Hardware Selection
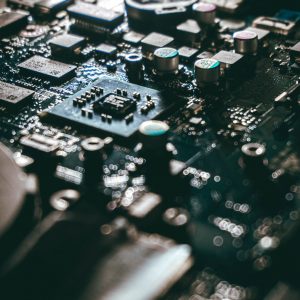
The first step in building a powerful Unraid NAS is selecting the right hardware components. A simple network attached storage array does not require much CPU horsepower, however utilizing your NAS as a Plex Media Server, dedicated game server, and so on, may require more then the average Celeron. Let’s take a closer look at the key components for this build:
Intel Xeon E-3 1245 v2 – although my original FreeNAS box ran on an i5 3000 series processor, with the transition to Unraid I wanted a bit of an upgrade to the old quad core, opting for a very cost effective Xeon from generations past and netting the benefit of hyperthreading for a cool $30.00 USD from Ebay. Pair that with another 32 GB RAM upgrade from TeamGroup with a $46.00 amazon special, and thats quite an overhaul for under a hundred dollars.
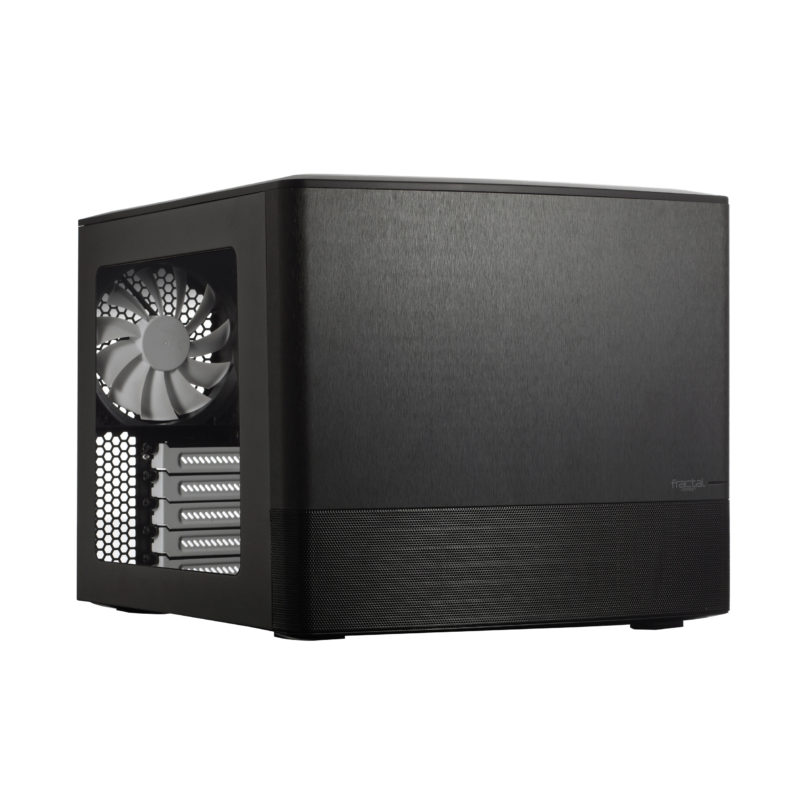
I’m also sticking with the Node 804 from Fractal Design, I used this case for the original FreeNAS build and I have never regretted it, nor do I want to change from it. The 804 and every other Fractal Case I have worked with are worth every penny with their build quality and aesthetic and houses a max of 10 hard drives, but is not a necessary expense if your wanting to build your first NAS on a budget. Alternatively, here are a few other cases I would recommend for NAS builds that are easily attainable at a few different price points.
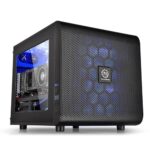
Thermaltake Core V21 – Coming in at $69.00 USD at the time of writing this little beast is a wonderful system chassis to work in. This chasis can house up to 3 3.5 in HDD’s and 3 more 2.5 in HDD’s or SSD’s making it a perfect starting solution for a home NAS build
Cooler Master N400 – Landing at $83.99 USD at the time of writing this case house a major array, totaling 8×3.5 inch HDD bays and 3×2.5 inch bays the N400 beats the drive capacity of the Node 804 at a much lower price, and is even compatible with full size ATX motherboards.
Keep in mind that these are simply the parts I either had already, or made sense based on my current platform, but these are not your only options. Older hardware really shines when repurposed into a NAS, so if you have an old workstation or hand-me-down computer from the In-Laws, that very well may be the building blocks of a very capable NAS. The two main things to think about are:
1. Hard Drive capacity – a core building block of network storage is the storage itself, an array of drives with Unraid can be any size to start, but adding more in the future as your needs increase is a good bet so I would avoid purchasing a dedicated case that can can only hold 4 drives maximum.
2. Upgradability – take my NAS for example, on the current LGA 1155 platform I have very little higher grade processors I could upgrade to without replacing the motherboard and ram all together, which is a major red flag if your building your first NAS. Mine already has 5 years of use so Im just now reaching the end of my upgrade path.
If your new to PC building and parts, but your curios if some spare hardware you have laying around would work for a NAS, leave me a comment of what you have and I will try to give you my best advice on will it or will it not NAS.
Building the System
For the purpose of this guide I am going to assume you are familiar with the foundations of PC building, but feel free to read my “PC Building Basics” if your unfamiliar by clicking this Link:
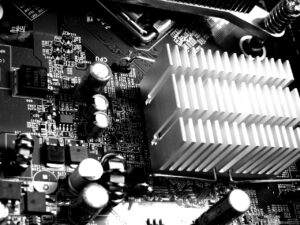
Beyond basic assembly one niche aspect of this system is the addition of an HP H220 HBA, or SATA/SAS controller. Most modern motherboards only provide 4-10 SATA connectors, including my Gigabyte motherboard boasting a solid 6 SATA connectors. The HP H220 grants me another 8, and can be acquired for roughly $40.00-$80.00 USD through Amazon or Ebay.
Otherwise the build is fairly straightforward, so we will be moving to the installation of Unraid and the Initial Setup.
Preparing your Installation Media
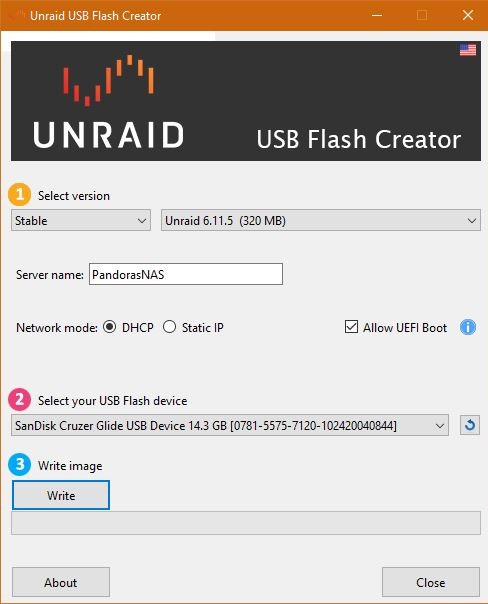
First we need to get our installation media and boot drive ready. Unraid runs entirely off of a USB thumb drive, residing in RAM after booting and only writing system changes to the USB.
It is important to note that unraid is a paid license after the 30 day free trial, and two 14 day extensions. It starts at $59 USD for the basic(6 drives), $89 for the Plus(12 drives) and $129 for the Pro(Unlimited drives), but they do have a 30 day free trial, as well as two 14 day extensions on that trial. So you have plenty of time to try it out and make sure you want to purchase a lifetime license.
To start make sure you are using a quality USB drive and navigate to unraid.net/download to get yourself the media creation tool. Once downloaded open the .exe and run the program. Select your USB drive and the most recent stable version, name your server, and pick static or DHCP if you’d like. These settings can be changed later in the web UI.
Once all the options are checked click write to burn the ISO to the USB drive. We will be plugging that drive into our Unraid Machine after this.
Initial Boot & Install
For the Initial boot, you will need a monitor and keyboard connected to your newly minted server. Afterwards the system can run headless, but for now plug your usb drive into the server and enter BIOS.
- Set your Boot priority order to USB flash device first.
- Turn on any Virtualization options your motherboard offers, such as IOMMU.
- Save your changes and exit BIOS.
Once the server reboots, it will load into the UNRAID installation automatically. Once complete it will display your servers LAN IP address used to access the GUI. Once this is displayed you no longer need the monitor attached, simply go to another computer on your local network, open a web browser, and enter the LAN IP of the Unraid server. For me it is 192.168.2.213.
Unraid Setup
When accessing your Unraid Server for the first time you will need to register the device and create an account. Click “Get a Trial Key” to begin your free trial, or purchase the license that suits your needs. The free trial last for an initial 30 days, but can be extended by two 14 day increments. The licenses are all lifetime, or a one time payment for permanent ownership. Either way the trial or license will be linked to the GUID of the USB drive you are using, and that link can be backed up to Unraid’s cloud as well via the “My Server’s” plugin.
Once registered and the Root account created, you will be redirected to your servers main screen it may look a bit different then mine but don’t worry, just a little more Setup and your server will be up and running.

First you will want to set up your drive array, select the appropriate drives for Parity, Disk’s, and Cache (if applicable).
- Parity is for redundancy, a data backup should one of your Data Drives fail and require replacement. Parity drives must be your largest drives.
- Disk’s are your data storage system, the total of these will be your total available storage space.
- Cache is specifically a Caching drive, and is best utilized with a solid state drive.
- Flash is the USB device housing your Unraid Operating System.
Confirm your Drive Allocations are as desired before starting your array, once started the array will begin a parity sync and integrity check. The parity sync can take several hours depending on your arrays size.

Once you have made your selections click “Start Array” to spin up your drives and begin Parity Sync.
Dashboard & Dockers
Once your Array has started, the remainder of your GUI becomes accessible. Click “Dashboard” to view your server information.
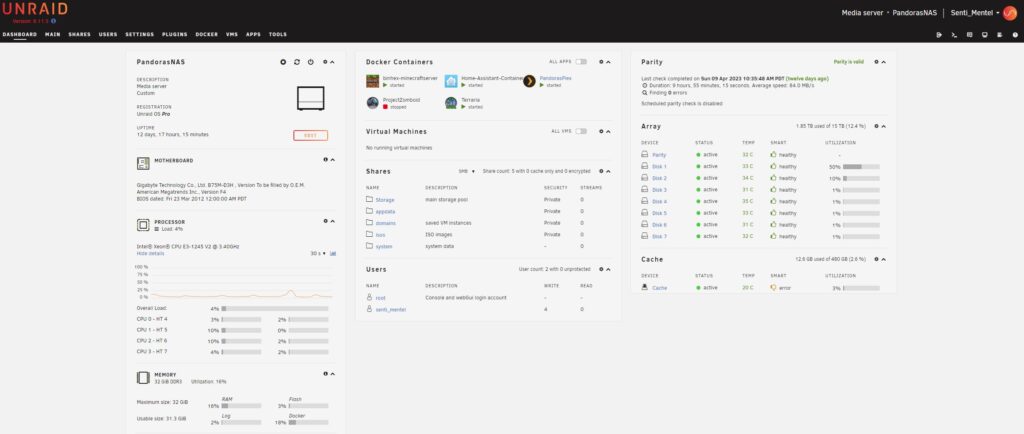
Here you can change your Server Name and Icon by clicking the gear icon to the top left. You can also view your cpu utilization, platform information, and NIC interface transfer speeds.
Network Shares Setup
Next we will set up our network share and users. First click “Setting” and “SMB” under Network Services. Click to Enable SMB and then Done. Next change to the “Users” tab and then “Add User”. Set the username, password, profile picture if you’d like, and click “Add” to create the user. Next let’s click “Shares” and “Add Share” to create a new folder within your array. I named the folder “Storage” but it can be anything you want. Scroll down to SMB Settings and change export to Yes, then change Security to Private and scroll down once more to add read/write access for each User you want to grant access on your network.
I suggest allowing read/write access for “App Data” and “Storage” to your main user you just created, and generating more users for anyone else that requires access to your main storage pool and limiting access to the other folders. After your Users and Shares are set up correctly, open your file explorer and right click under network locations to map a new network drive, you may need to enable network discovery following the prompts, and then browse your network to mad the location as a Logical Drive on your computer.
Terraria Docker/Dedicated Game Server
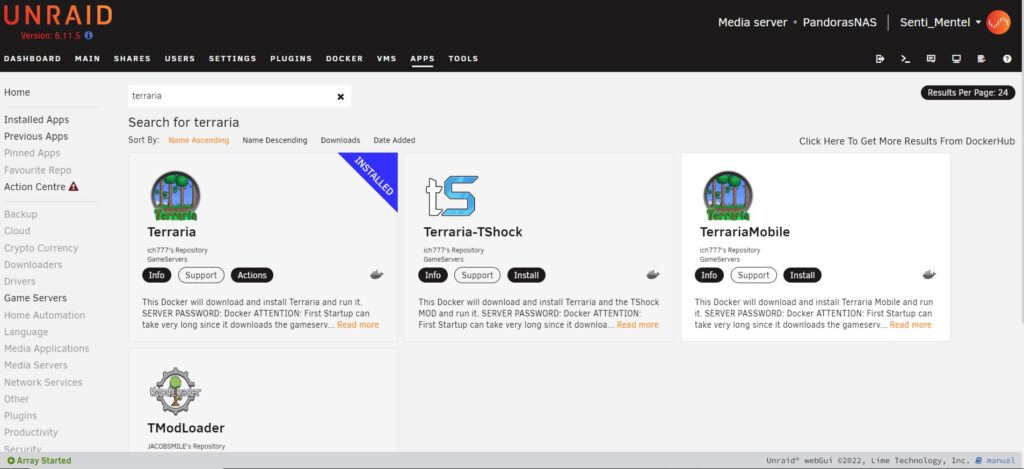
Click on Plugins to install the “Community Plugins” App to access Community supported Docker Containers. It is also recommended to backup your installation through the “My Servers” Plugin, so download that as well. After installed click “Apps” and search “Terraria” to install our first Dedicated Game Server, there are many many options to chose from for dedicated game servers, and most installations are identical to this one. Click Install on the Official Terraria dedicated server to install from ich777’s repository and choose your options. Leave ich777’s options as default unless you know what and why you are modifying and click install to run the install script.
The installation script may take a while to show completed, but once done navigate to your network share for App Data and access the “Terraria” folder within. To modify the configuration of your server open the “serverconfig.txt” file with a text editor like notepad(I suggest Notepad++ or Bluefish) and make your changes, then save and restart the Docker Container under the Docker Tab. I also set my dedicated servers to start on boot.
Forwarding Ports
Now that your dedicated game server is up and running, you are able to connect to it via the IP address displayed in either the Docker section, or in the web interface you can get to by right clicking the Server’s icon. However if you want your friends to be able to play with you, all you need to do is a little port forwarding. Here I will be forwarding ports on an Asus AC router, but the process will be a little different for other router firmware.
On Asus routers, just navigate to “Wan” on the left side, then click to the “Virtual Server / Port Forwarding” tab and select Add Profile at the bottom. Now all you need to do is enter the Ports of the dedicated game server, which are 7777 for Terraria, under external port, and select the Internal IP of your Unraid Server. Also enter a name like “terraria” as the Service name so you can remember later on and click “OK”. Now restart your dedicated server, and both you and your friends can join your new server via your external IP, which you can get from googling “whats my IP”.
Finishing Up
Now that your Server is up and running, you have a dedicated game server running and a platform to install more in a handful of button clicks. You also have a platform for a Plex Media Server or similar media streaming service, home assistant, the list goes on and the possibilities are endless.
If you want to see more setup guides on Unraid Dockers, take a look at my other write ups for more.
If the information in this guide was helpful to you, consider signing up for the SentiMentelTech Newsletter and leave me a comment.
Supscribers and Followers to my up and coming Youtube Channel and Social Media is also greatly appreciated, if you want to help me keep making content like this please consider clicking the Social Icon’s below!